How to build a Geodesic Dome Greenhouse
Building a geodesic greenhouse should not be expensive or too complicated. That was one of the main goals of Magidome from the start: Make a versatile and simple to construct solution that utilizes local materials to build a stoic addition to any garden or backyard. On the basics of building a Magidome click here.
This smaller Magidome was built by @organicallygrowing on Instagram


This stoic mini Magidome greenhouse build by the lovely @thelivinghomestead

So the general beauty of building a Magidome is in the simplicity of it all. Equal length wood, pre-drilled and screwed together to build the simplest geodesic structure that exists. Check out our basic Instructions to see just how easy it is.
Most folks choose to cover their dome with UV resistant 6 mil poly or greenhouse plastic from a local hardware store. It is imperative to cover your dome nice and tight as well as add braces in each triangle for extra strength. One can simply wrap their Magidome and staple it to the wood frame. That is on of the true awesome aspects of using wood as a building material. Other steel or aluminum framed domes need expensive custom coverings that degrade with temperature, seasons, and UV exposure. So while using poly or greenhouse plastic may not be the most appealing solutions, its affordable as well as customizable. One key note to mention is as one covers any structure it increases the wind resistance and load from external forces. This is made even more dramatic the larger one builds. This is why we always remind folks to add braces, anchor to the ground and shelter from wind.
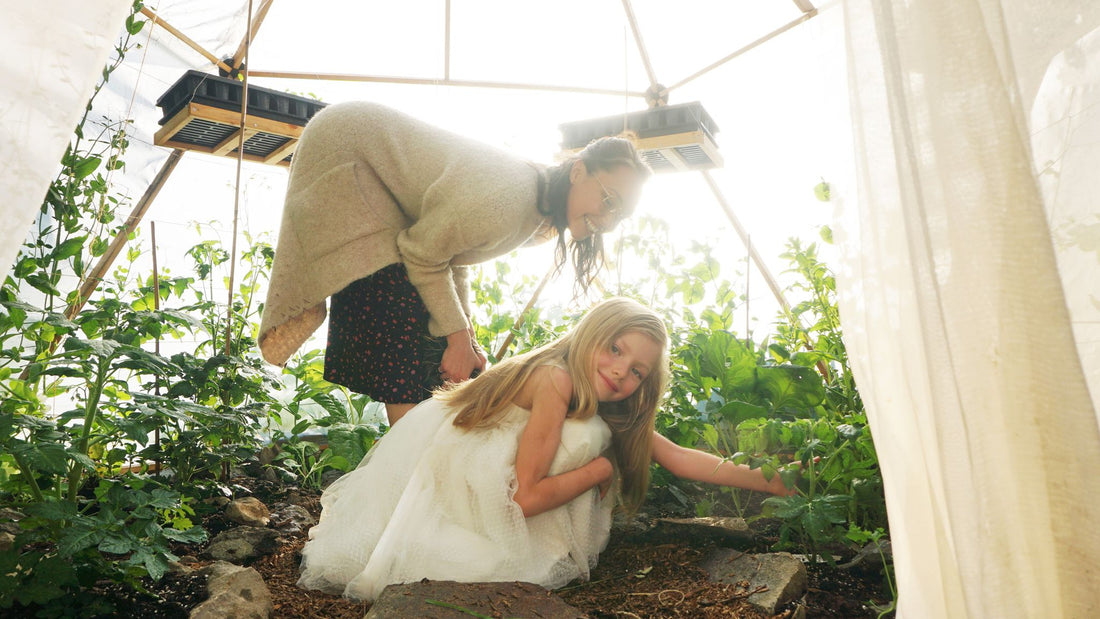
Inside the first ever Magidome Greenhouse


The bottom of a a Magidome can be wrapped in one long piece as it just so happens to fit a rectangle. This makes light work of half the dome. Depending on the size of your dome the top can be completed in individual triangles or one massive piece depending on the width of your material. * Be sure to add your braces prior to covering and take into consideration ventilation for any greenhouse. Having a roof vent or even roof holes covered by a rain flap can make the difference between inferno and ideal growing temperatures.
The bottom of your dome can be wrapped easily in one long piece. It may be easiest to cover your roof before wrapping the sides *This Magidome uses 6 ft lengths.

Here we have a larger building using 8ft 2x4" (max length reccomended). The braces help with integrity and keep the plastic from sagging to shed off snow. For larger snow loads we recommend routinely removing snow to keep heavy loads and stress from your dome.

This roof vent designed by James Morrow @mammothguy222

Another great addition to your Magidome greenhouse is the use of furring strips; thin wood slats along the edges of your dome to cover the plastic, and add for a cleaner look.
Magidome Greenhouse pod with furring strips by @lylejingley

Lets take a look inside! Here we see some simple shelves and some rocks serving as thermal sink (these warm up during the day and release heat into the night).

Notice here the dome itself is resting off the ground moisture to reduce any future decay. Its also recommended to treat your wood with a non toxic wood stain.
A look inside the Magidome by.
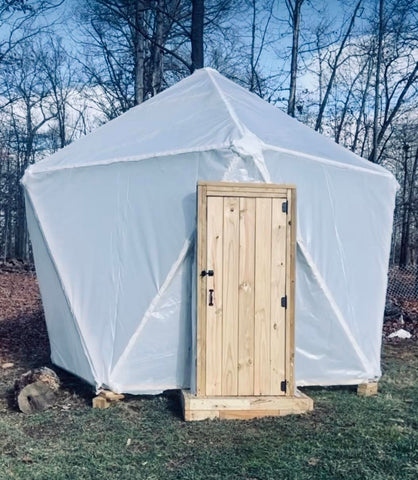
Many folks ask us about solutions to entry ways and doors. Most common is simply draping the covering over on of the open triangles for a draped walk-through entry. Another solution is building and an actual door. Whether framed in, or triangular, this may be helpful for keeping critters out. Using a shear white curtain in your entry way will allow ample air flow yet filter out aphids and other insects and critters. Be sure to move the curtain during pollination season otherwise pollinating insects will be trapped out, or inside your dome.
Order your own set of Magidome Connectors Here
Be sure to follow us on Instagram @magidome for amazing builds, design ideas, and for the awesome community of growers, gardeners, designers, builders, and creators!
For more Magidome uses and design concepts check out our Uses page!
