Step by Step:
-

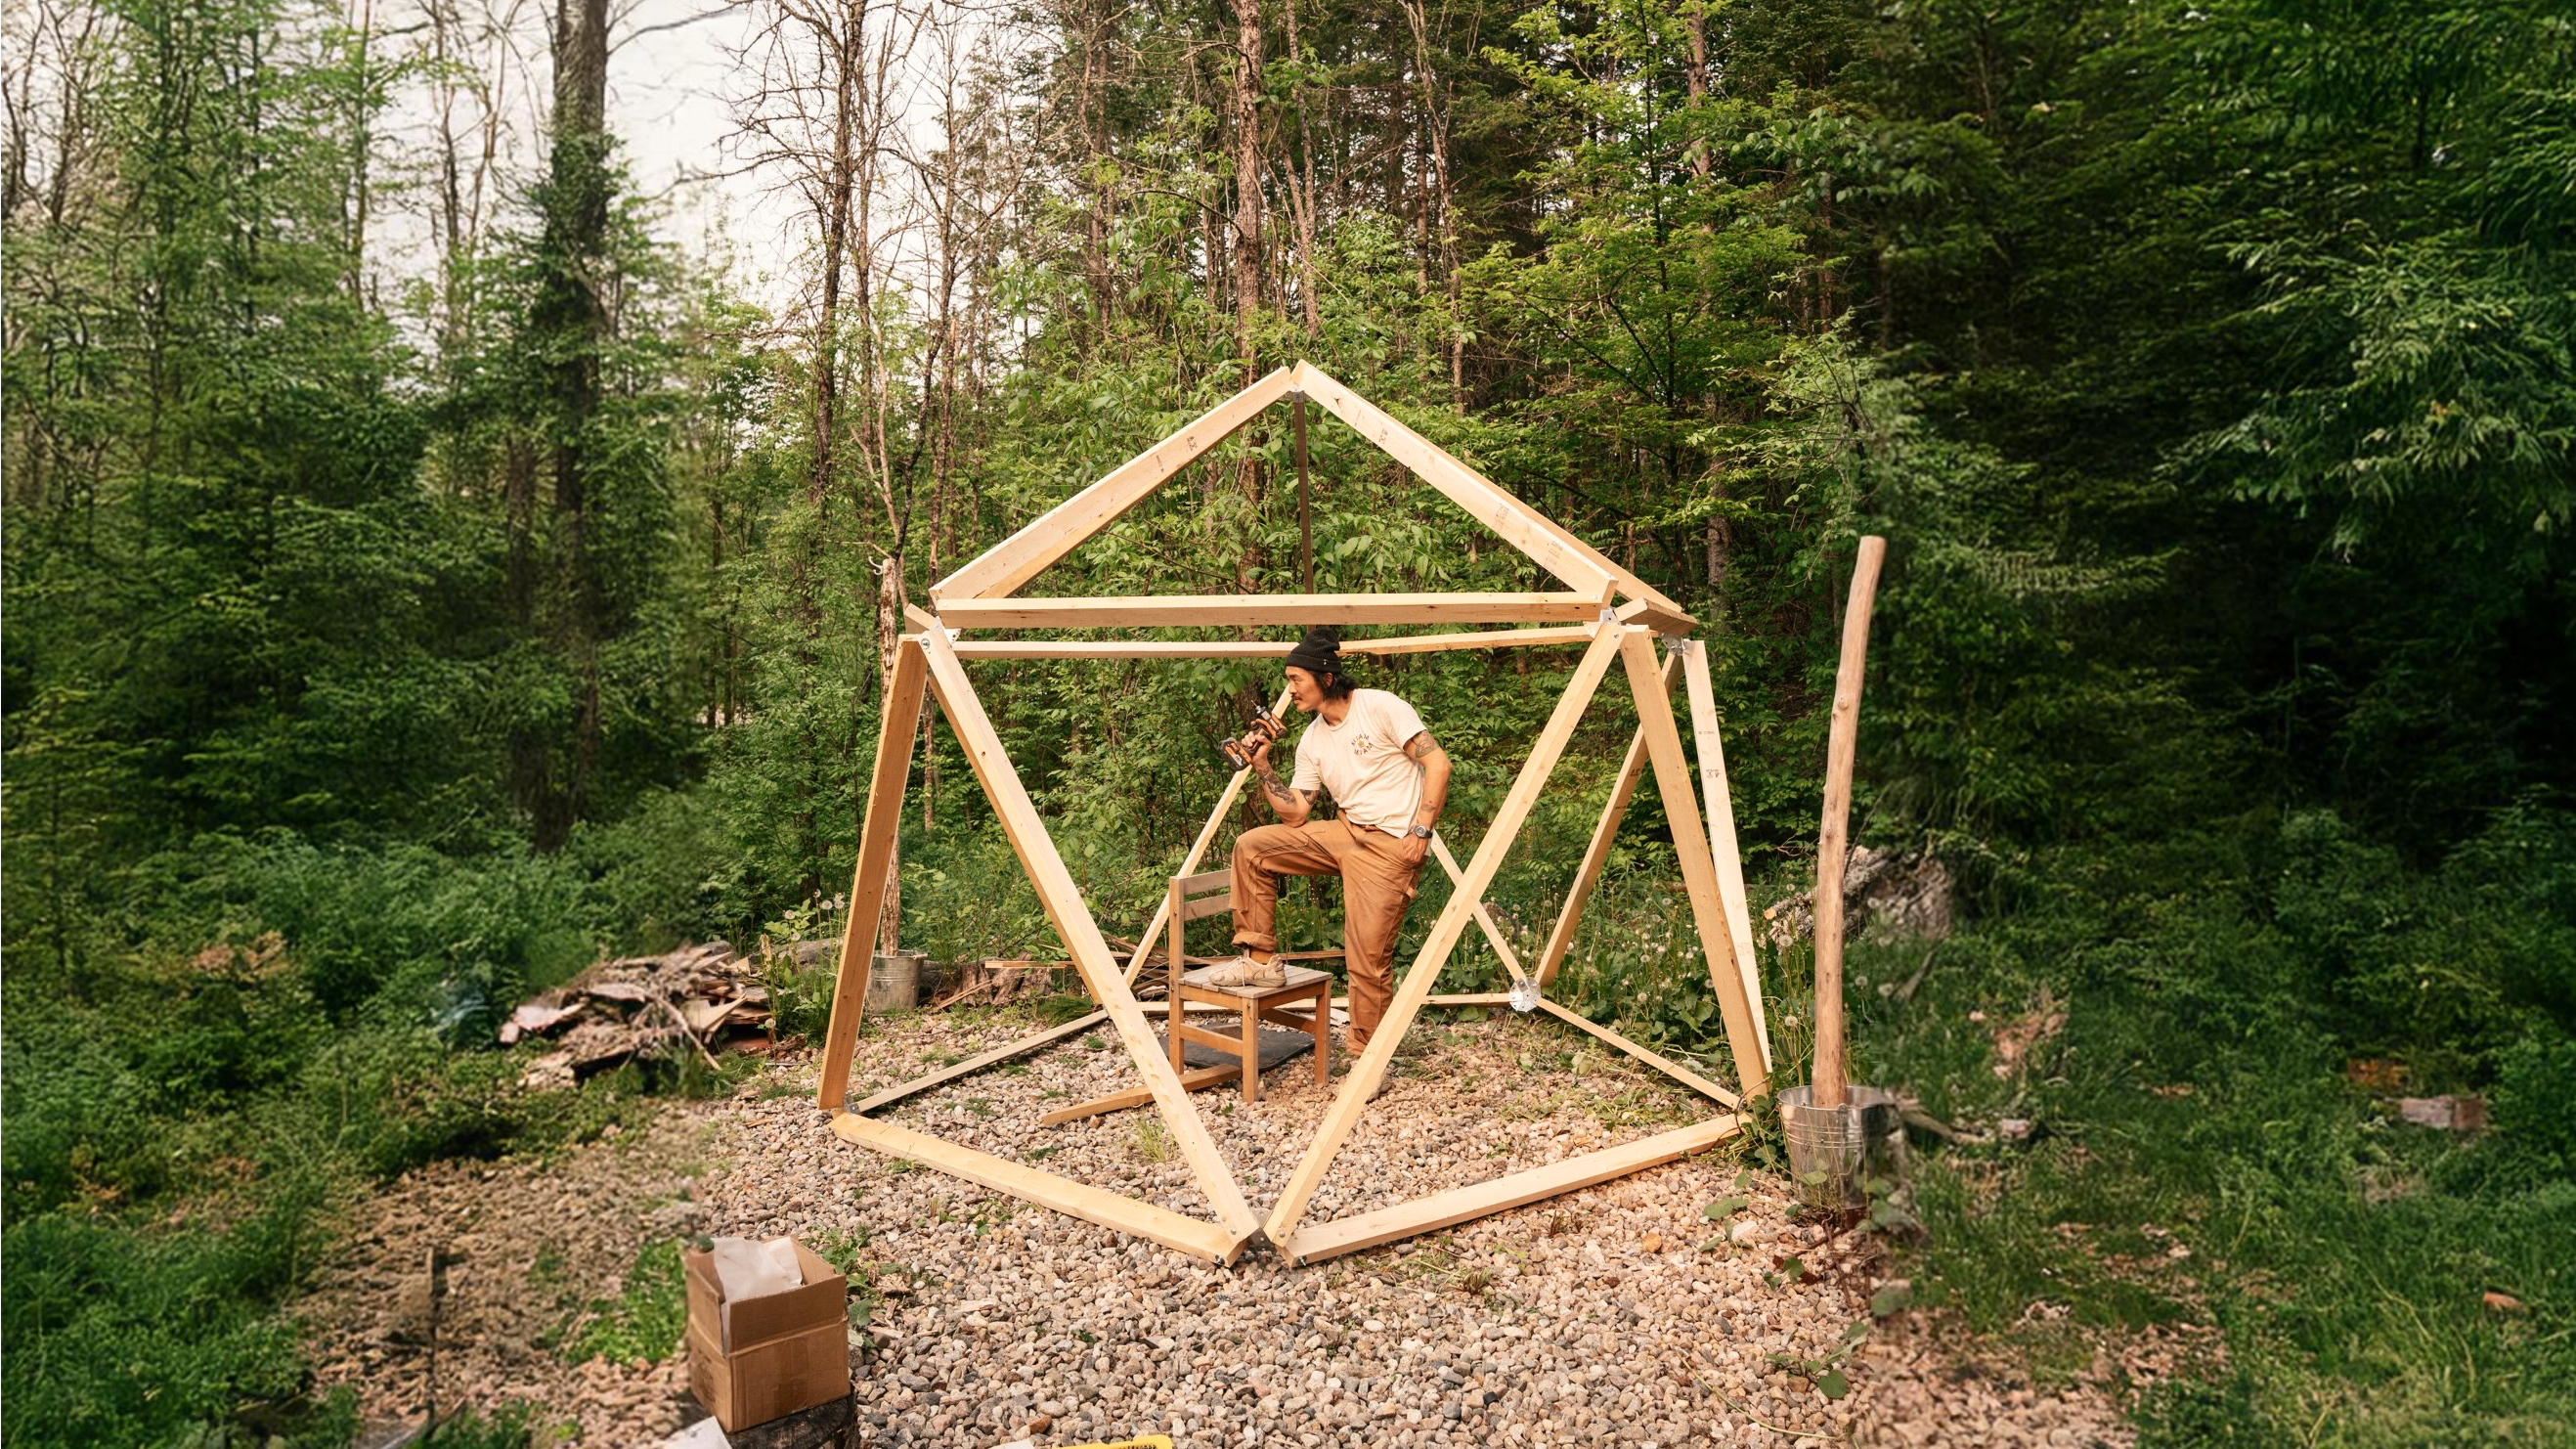
Step 1:
Cut your Lumber into 25 equal lengths and pre-drill each & using a connector as a template.
For angled ends cut at 31.6 degrees.
-

Step 2:
Assemble!
On level ground, assemble snug from the ground up. Be sure to support each beam during installation. 5/16 Carriage bolts recommended for robust projects.
-

Step 3:
Customize your dome!
Be sure to brace your dome, anchor to the ground and shelter from the wind. Bracing your dome adds strength and style! (See below)
Finally, customize to perfect your project! Cover in poly for a greenhouse, wrap in fabric for a tent. Be sure to brace, anchor to the ground and shelter from the wind.
More on anchoring your dome Here
Check out the potential uses for your dome Here


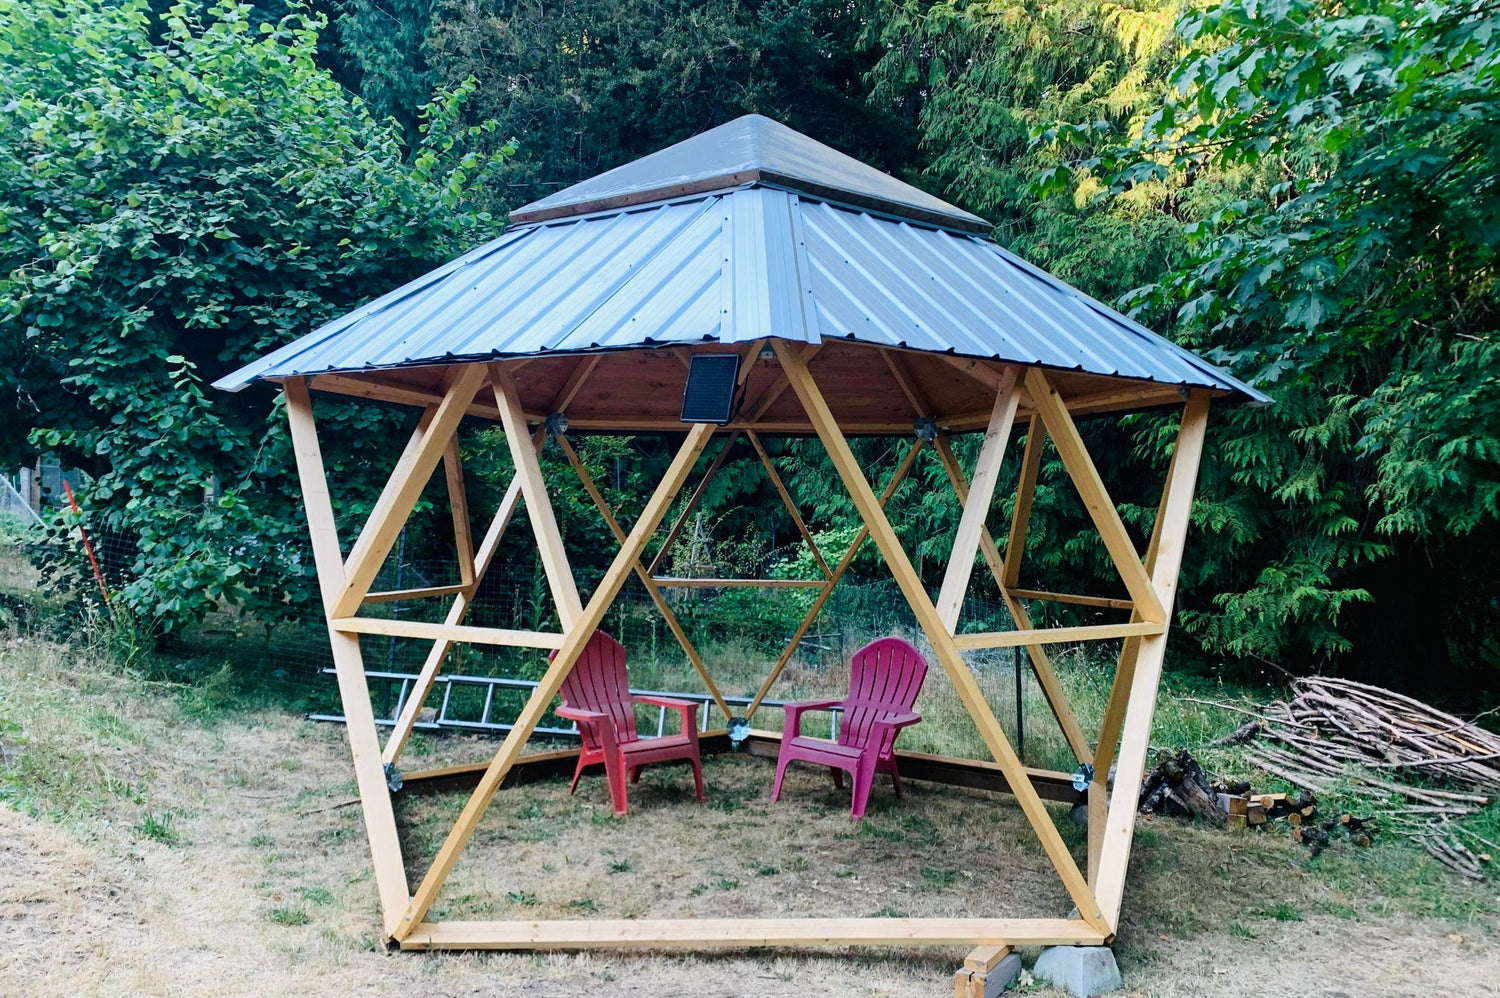
Adding Braces
Its easy!
Adding internal braces makes your dome stronger and more stable. To add braces, cut extra lumber at 34.5º opposing angles on each end. (For compound saws cut 22.5º vertically and 24º horizontally)
Or check out Bracing in our design blog Here